
The Transfer phase of the Custom Objects stage is where the transport of changes to the target system occurs.
Once the Transfer programs have run it is time to view the results, go to the ‘Results’ drawer and select the ‘Custom Objects’ and then navigate to the ‘Transfer’ tab.
The screen below shows the Custom Objects grouped by object type with the numbers of objects in each type, the percentage that have been transferred and any errors.
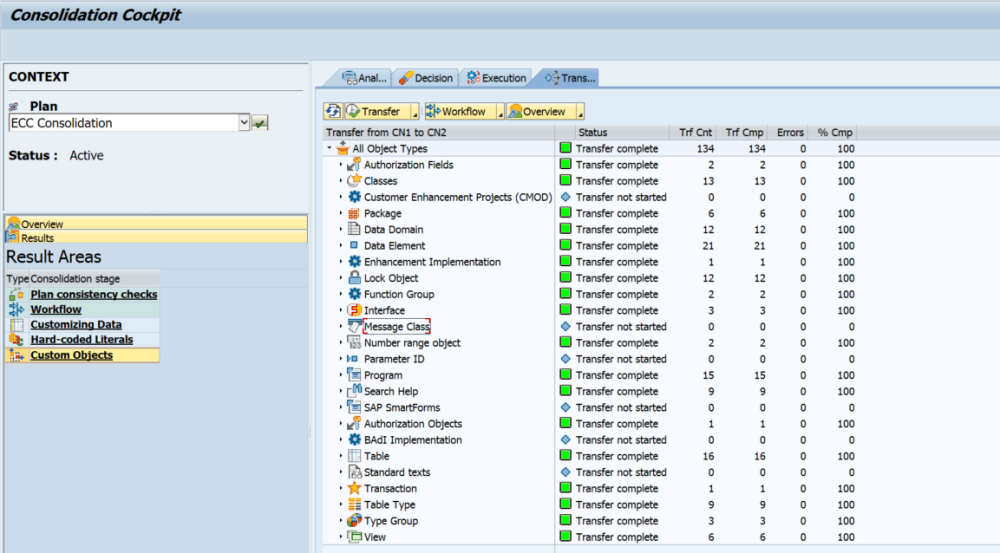
The buttons on this screen operate by clicking the right hand down arrow ![]() details on what each button does are as below.
details on what each button does are as below.
The ‘Transfer’ button ![]() allows the user to transfer the changes, however, it is recommended the user does not use this and completes this through the operation drawer as this adds greater clarity.
allows the user to transfer the changes, however, it is recommended the user does not use this and completes this through the operation drawer as this adds greater clarity.
The ‘Workflow’ button  allows the user to open and close this phase.
The ‘Overview’ button  allows the user to view the reports for this phase, see the Reporting section for more details.
On the custom objects screen below, opening up an Object Type provides groupings based on the status of the objects, effectively if errors are found or the transfers are not complete then you can quickly find these objects via the status.

There are a number of options when using the right mouse click on objects.
Firstly ‘Display’ lets you simply display the object.
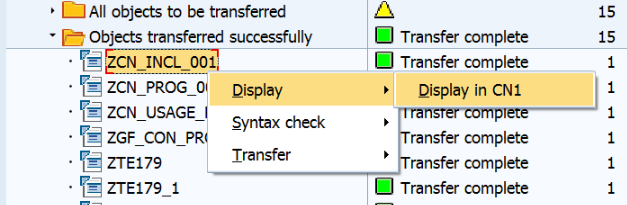
Secondly ‘Syntax Check’ this allows you to run a syntax check on the object.

Thirdly ‘Transfer’ lets you display the object in the target and update the status if required.
![]()
When you are certain you are ready to close the phase use the ![]() option on the ‘Workflow’ button and select close phase.
option on the ‘Workflow’ button and select close phase.
Post your comment on this topic.