
The Analysis phase of the Custom Objects stage this will provide the number of objects from each system and the number of conflicts that have been found.
Once the Analysis programs have run it is time to view the results, go to the ‘Results’ drawer and select the ‘Custom Objects’.
The screen below shows the number of objects in each system and the number of conflicts found between the systems.
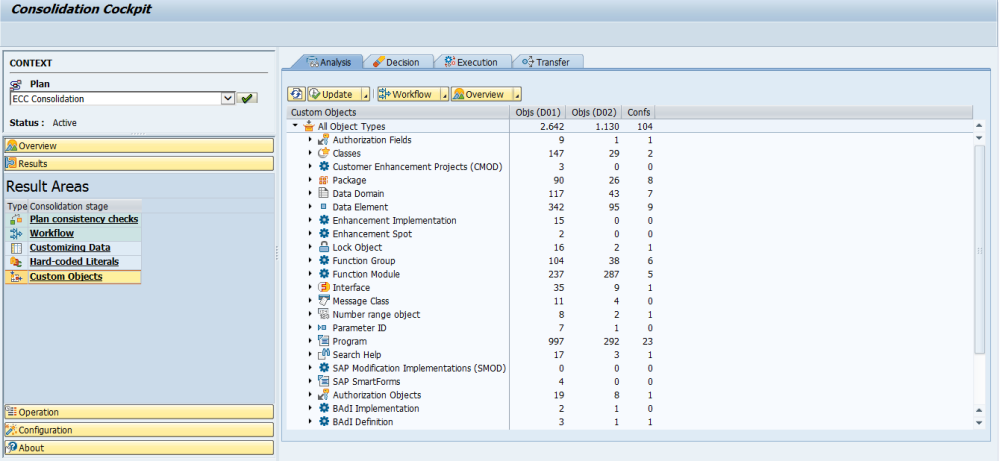
The buttons on this screen operate by clicking the right hand down arrow ![]() details on what each button does are as below.
details on what each button does are as below.
The ‘Update’ button  allows the user to run the programs for this phase individually, however, it is recommended the user does not use this and completes this through the operation drawer as this adds greater clarity.
The ‘Workflow’ button  allows the user to open and close this phase.
The ‘Overview’ button  allows the user to view the reports for this phase, see the Reporting section for more details.
On the custom objects screen below, opening up an Object Type provides further folders where you can view more information about the objects in each object type.

Opening up the ‘Attributes of Object Type’ folder provides you with further details, the top level showed a much higher number of classes in the D01 system, the number of attributes, lines of code and methods provides further details on this.
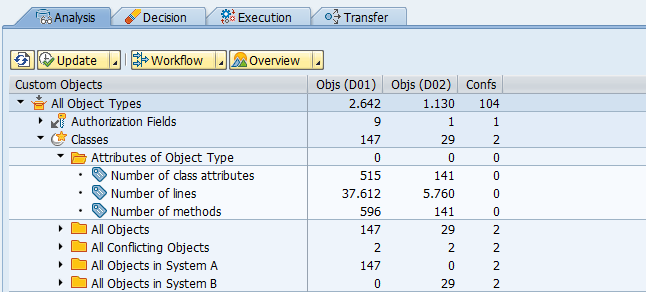
Opening up the ‘All Objects’ folders lists all of the objects of this type in both systems.

Opening up the ‘All Conflicting Objects’ folders lists all of the objects in conflict across the two systems. Here you can see opening up the object and viewing the attributes can help show further details on the differences between the objects, in the example below there are only 59 lines of code which are different between the two classes and one additional method, which suggests this object should be looked at in more detail because it is perhaps a candidate for a merge not a rename.

Below if you right mouse click on the object name then options to view the program in each of the systems or launch a remote comparison are available. This will greatly assist in making the correct decisions for each object.

Opening up the ‘All Objects in System A’ or ‘All Objects in System B’ folders lists all of the objects of this type in the chosen system

When you are certain you are ready to close the phase use the ![]() option on the ‘Workflow’ button and select close phase. Continue to the next phase Decision Phase.
option on the ‘Workflow’ button and select close phase. Continue to the next phase Decision Phase.
Post your comment on this topic.