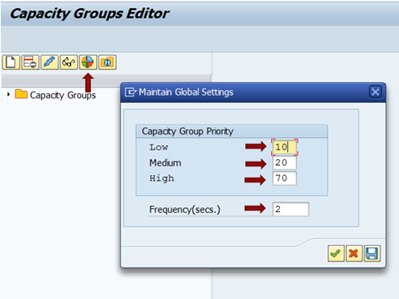
The main admin transaction to maintain Capacity Groups is /N/BTR/MDRCG. Before you create your first Capacity Group you should set up Priority at Capacity Group level as mentioned in section Basic Concepts. To begin, go to /N/BTR/MDRCG and click on the tool bar button for Global Settings as seen below.
Make sure that fields Low, Medium and High are populated with percentages and that all values amount to exactly 100% as shown above.
The Frequency input option allows you to set a time interval (in seconds) between each iteration of the Background Monitor. To create a new Capacity Group go to /N/BTR/MDRCG and click on the tool bar button “Create Capacity Group” as below.
Header Info
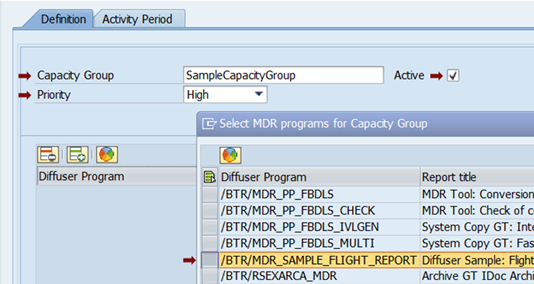
When the Definition tab appears on the right hand side of the tree, specify the header information in the top section.
Capacity Group: This input field is mandatory and should be used to assign a unique name.
Active: This check box should be ticked to activate the Capacity Group. If a Capacity Group is deactivated all of its Activity Periods and therefore its administration settings are disabled.
Priority: On the dropdown list you will have three options: High, Medium, Low. These refer to the Global Settings for Capacity Groups as mentioned at the beginning of this section.
Adding programs: Choose the Diffuser program(s) you would like to include in this Capacity Group as seen below.
At least one Diffuser program must always be assigned to a Capacity Group. However, programs can be deactivated individually (see Program Settings in Activity Periods).
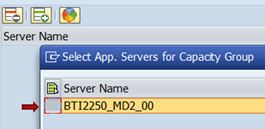
Adding Application Server(s): To the right of the programs section, choose one or more application servers as shown below.
So far you have defined the header info as well as the context of a Capacity Group. Now you need to create an Activity Period to define the conditions for the interaction between the elements in Context.


Post your comment on this topic.