
Select Test Plan to change
Use the drop down menu to select your newly created Test Plan and click the Tick. Now you can click Change Plan

Systems
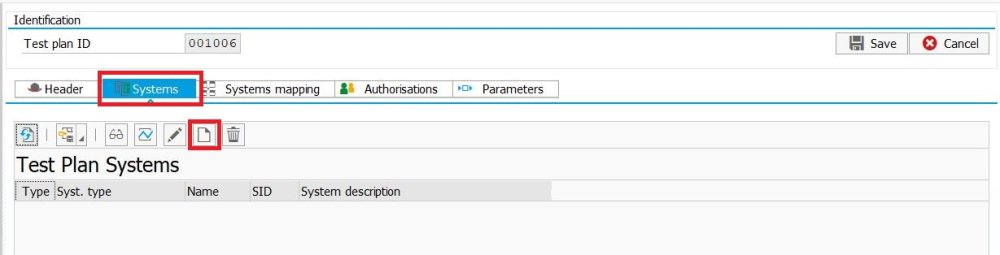
In the main window, you will see the Test Plan header information. Select the Systems tab and click the Create button. It’s good practice to start by creating your Source (Recording) system
In the Identification section, enter the required information as follows:
- System name: A 4-character internal identification for the system. Note that this is different than the standard 3-character SAP SID but it is suggested you use your SAP SID along with “R” for your Source (Recording) system and “P” for your Target (Playback) system. The 4-character identifier allows you to specify the same SAP system for both recordings and playback (for example, when performing initial smoke testing of Testimony).
- A short-text description for the system.
- A longer system description

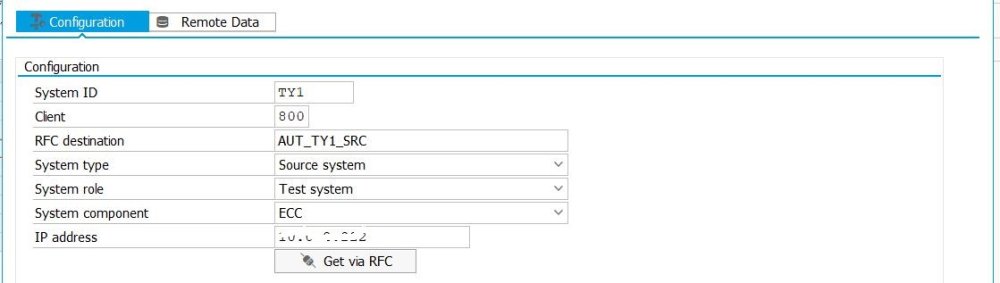
In the Configuration section, enter the initial technical information to allow the Testimony central system to connect to this remote system.
For a source system (i.e., a system that will be recorded), only the following information is required:
- System ID: The SAP SID
- Client: The client of the remote system to which the central system should connect
- RFC destination: the RFC destination to the remote system. This should already have been set up as part of the initial installation and configuration phase.
- System type: whether the system is a source (recording) system or a target (playback) system.
- System role: whether the system is a production system or a test system
- System component: the SAP system component (ECC, BW, etc.)
- IP Address: you can get the IP address of the system by clicking on the “Get via RFC” button. This will connect to the remote system using the RFC destination that you specified during the technical setup.
For a target system (i.e., a system into which your recordings will be played back) the following additional information is needed so that the playback bots know how to connect:
- Connection type: Whether the bots will connect directly to an application server or will use logon load balancing
If the connection type is “Application server”:
- Target host: The host name of the application server
- Instance No.: The SAP instance number

If the connection type is “Message server and logon group”:
- Message server: The host name of the SAP message server
- Message server port: The port number (usually 36nn) that the message server listens on
- Logon group: The logon group (from SMLG) that the bots should use to connect to the system

In the Misc. details section enter any (optional) configuration:
- SAP router: If you are using a SAP router to secure access to the playback system, enter the SAP router string here
- Gateway host: Enter the SAP gateway host
- Gateway service: Enter the SAP gateway service id

Once complete click the Tick to save your configuration. You’ll receive the following status message. At this point you should also save your plan

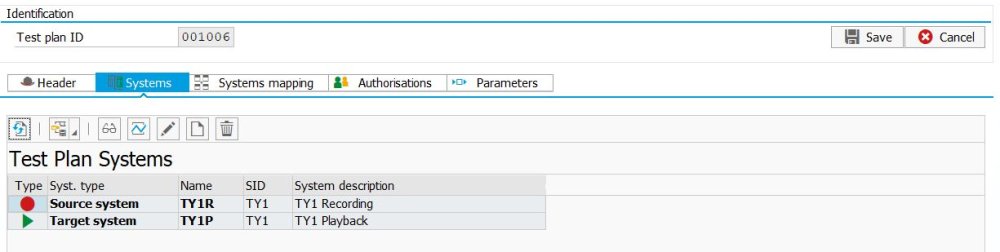
Repeat the same steps to configure additional systems. You will minimally need a Source and Target system defined.
You should now have at least 2 sytems defined in your plan
Systems Mapping
It is now necessary to map the systems so that Testimony knows which recording system equates to which playback system. This is a required step, even if you only have two systems in the test plan. In the test plan screen, go to the Systems mapping tab. Here you will see the systems you have defined. Click on the Create Link button

At this point, your cursor will change to a Pencil. Draw a line between the two systems you want to link and you get the following screen where you can click the Save button to save your System Mapping.

Remote data
The retrieval of remote data from the source system enables Testimony to perform a number of important functions. Firstly, it allows text descriptions of objects (e.g., transaction codes, screens, etc.) to be displayed, making the job of interpreting the output from Testimony much easier. It also allows Testimony to gather certain technical information (e.g., screen field definitions) which are an important part of Testimony’s “learning” process.
Remote data extraction only needs to be run in one system for each SAP component type (e.g., once in ECC, once in SRM, etc.). Other systems of the same component type can share this information. Basis Technologies recommends that this data be extracted from a test system to avoid putting any additional overhead on production.
The remote data extraction needs to be run when a new system landscape is first added to Testimony, and then when there is a major upgrade or release. For example, if you are applying support packages then a further extraction will be required so that Testimony has the most up-to-date definitions of the objects that it uses. We also recommend that, in any case, the extraction is run at least every 6 months so that Testimony can be kept up-to-date.
To extract the remote data, within the Change Plan screens, navigate to your source system and go to the Remote Data tab: You will see all of the remote data types that Testimony needs to extract, and also that the remote data extraction has not yet been executed.

You can start the remote data extraction by clicking on the “Run remote data in background” button.
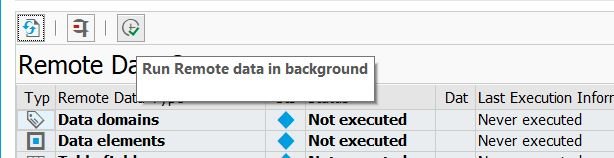
This will start a background job in the Central System which submits requests via RFC to the source system to gather the required data.
Alternatively, you can extract the data for individual components by selecting the component and clicking on the “Execute extraction” button.
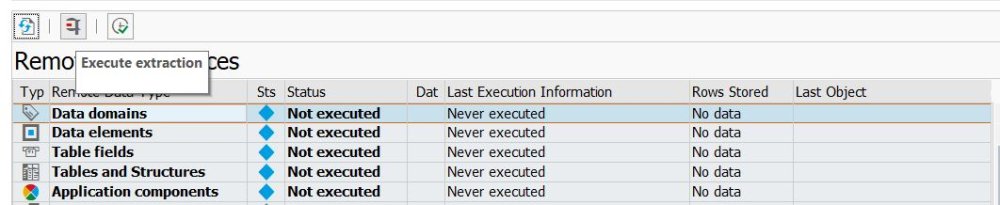
Note that some of the data extraction steps (in particular, the extractions of Dialog screen fields, Table fields and Program parameters) can take a very long time.
If submitting the extraction in the background, you can check on the status of the extraction process from within this screen by using the Refresh button.

Note that extracting all of the remote data from a system can take 18-24 hours.
If you have already extracted the remote data for one system, then you can re-use this data, avoiding the need to re-run this process. To do this, go into Change Plan and change your source system, then navigate to the Remote Data tab.
You will see that the Remote Data Plan and Remote Data Sys. Name fields are editable via drop-downs. Select the plan whose remote data you wish to use, and the system field will be automatically updated, as will the extraction statuses of the remote data objects.
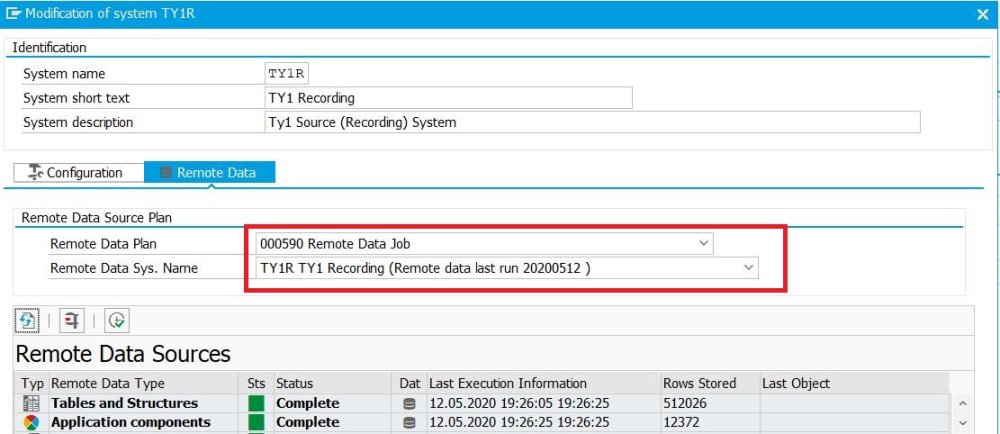
Click on the tick to confirm your selection, and then save the plan.
Post your comment on this topic.