
Overview
When a recording needs to be stopped immediately the abort option can be used. Whilst used infrequently this can be an option to use if you have a concern about the recording on the source system. This option means the recording is not stopped in the usual manner and may require more effort if you want to use this recording to playback.
There are three ways a recording can be aborted:
- Manually via Testimony on the central system using the abort button in the Shared Memory Explorer, more details here.
- Manually directly on the source system via the transaction /BTI/AUT_ABORT_REC or program /BTI/AUT_ABORT_REC in SE38. This option is helpful if there is an issue with the RFC connection between the central and source system, more details here.
- Testimony ca also abort automatically when the recording has completely filled the shared memory on an application server and writes directly to the DB more times than the general parameter ALLOWED_DB_WRITES per minutes (normally set as 1000).
All aborts ensure the following:
- The recording switch is turned off on each application server
- The shared memory is cleared down on each application server
- The status on the central system is updated as aborted.
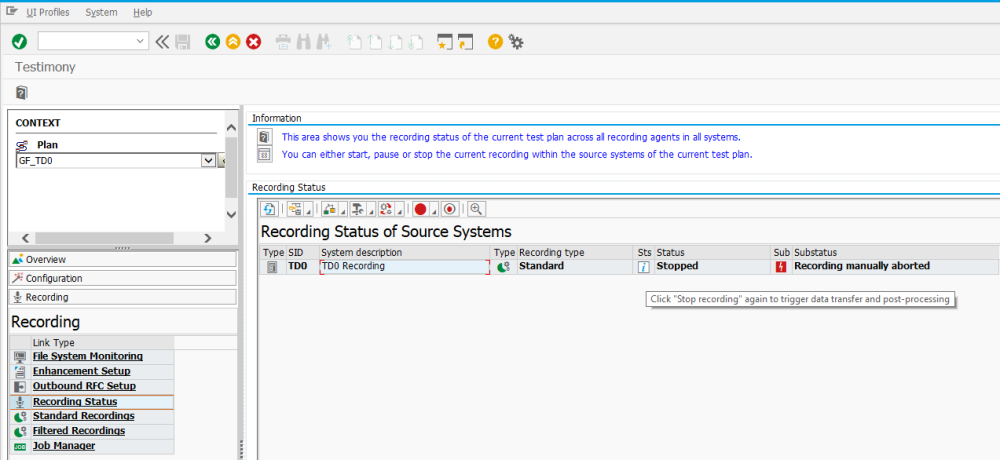
Note the status of the recording appears as below after an abort then to retrieve the data and run the full post processing steps you should use the stop button.
The button  can also be used to analyse how many direct DB writes were performed to enable you to tune to prevent an automatic abort on exceeding the general parameter ALLOWED_DB_WRITES per minutes (normally set as 1000) for your next recording.
Post your comment on this topic.