
Overview
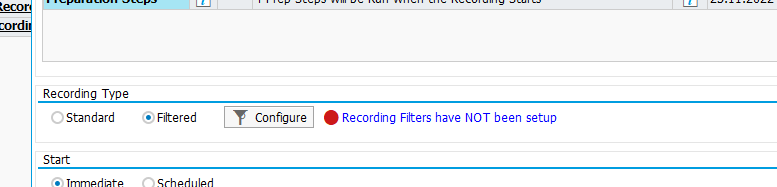
There are two types of recordings you can perform with Testimony. The most common and the one that will be shown below is a Standard Recording. A Standard Recording will record all activity in the Source system until the recording is stopped. The second type of recording is a Filtered Recording and is only needed when you want to limit your recording to particular users, transactions or activity types.
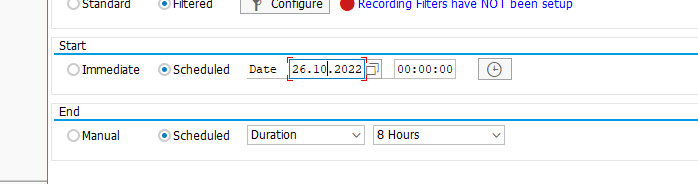
You also need to decide whether you are going to start the recording immediately or schedule it to start at a later time.
Process Steps
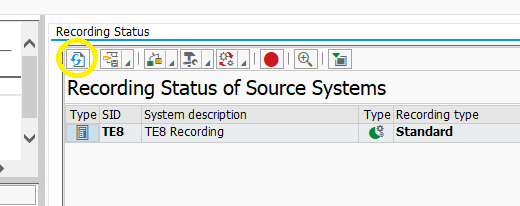
To start a Recording, navigate to the Recording Status option on the Context Menu and then click on the Start Recording button.
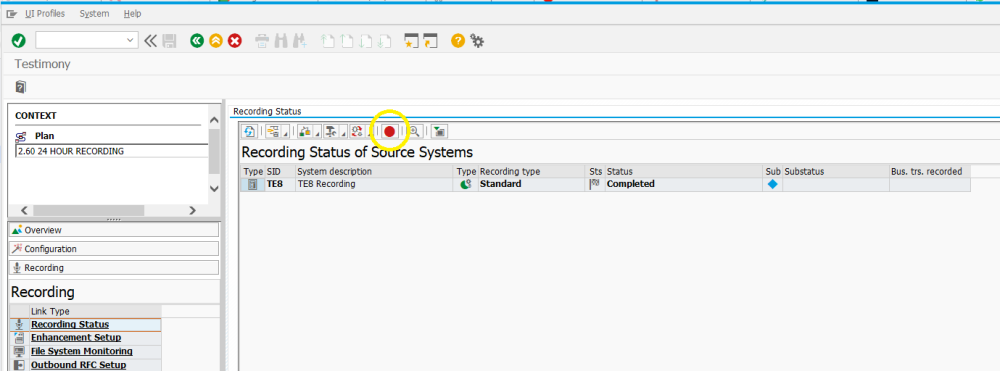
This will bring up the Recording window.

The Check Steps will have been run automatically, but you can run them manually.

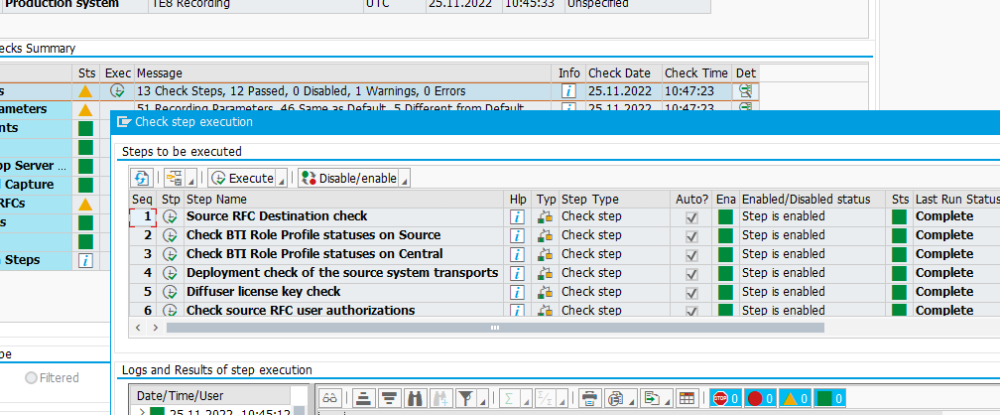
Once all the relevant checks and general parameters have been verified you can move on to selecting the Recording Type
Standard will record everything, but still following the rules est out in the Filters
Filtered will give you the option to run against certains hard and one-off parameters such as only recording:
- RFC
- Dialog
- BSP
- WebDynPro
- Batch
- WebService
and for each of these, by restricting against:
- Username
- Transaction Code
- ICF Node
- Function Module Name
You can also schedule the recording to start at a later date/time. Very useful for starting midnight recordings and having the checks, enhancements and status verified in advance.
The enhancements marked as Mandatory in their setup will be turned on automatically before the recording starts.
If an Enhancement is Released but it is not mandatory, it will return an error, which will prevent you from Starting the Recording
In this case you need to ‘Lock’ the Released Enhancement so that it does not need to be mandatory
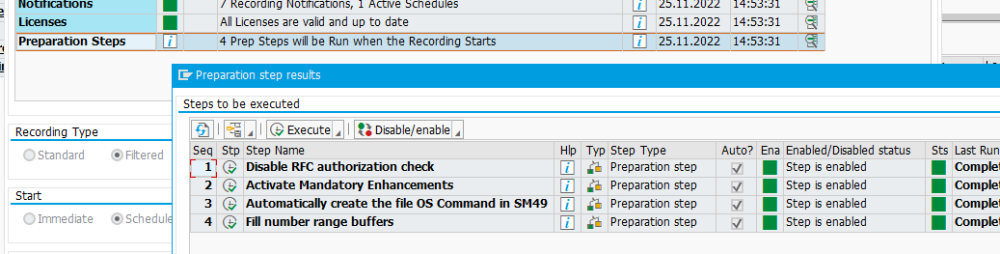
You can also refer to the Preparation Steps which will be run automatically from here:
Once everything is checked, you can click the Immediate or Schedule button which will be at the bottom of the screen.
At this point, the recording should begin, or be marked as scheduled in the Recording Status screen. To check, click on the refresh button until the status shows as Running.
The SAP status bar will also show the following message

Preparation Error
At the start of the recording process, Testimony will run “Preparation Steps”. If any of these steps fail, then you will see the recording go into a “Preparation Error” status. In this case, you can check the results of the preparation steps by clicking on the Preparation steps button and choosing “Show steps”. This will allow you to navigate to the logs for each step and analyse the cause of the problem.
Once you have analysed and resolved any preparation errors, you can restart the playback following the process above.
Post your comment on this topic.